Search This Blog

Thursday, December 22, 2016

Slurp. Suck. Repeat


It's prime time for oysters.
Served with mignonette sauce, cocktail sauce, horseradish, or hot sauce, briny plump raw oysters on the half shell are downright sexy. That said, on occasion it's fun to jack things up and turn on the heat.

Skillet Roasted Oysters with Spiced Compound Butter.
Compound butters are the simplest way to add punch to just about anything. Make them in advance, chill, and stash them away until needed.

A little dab will do you.
I tossed 1 stick softened room temperature unsalted butter into the bowl of a stand mixer before adding 1 tablespoon Green County Cacklin' Hen Jalapeno Hot Sauce, 2 tablespoons minced shallot, 2 minced Henkels hot red peppers, 1 tablespoon smoked paprika, 2 tablespoons chopped fresh cilantro, flaked sea salt, cracked black pepper, and the zest of 1 lime. After whipping the butter into a frenzy, I scooped it onto a 10"x 10" sheet of plastic wrap, gathered the butter to the edge, formed it into a loosey-goosey log, and rolled it into a bumpy cylinder. After smoothing it out, I twisted the ends of the plastic wrap to compact the butter into a tight roll and slid it into the refrigerator to chill.

Aw, shucks..
Oyster shucking can be a challenge. Practice makes perfect. Diligence, patience, an oyster knife, a sturdy dish towel (or a meshed oyster glove), and a glass of wine help make it much easier.
After scrubbing, rinsing, and patting dry  2 dozen Blue Point oysters (from Lexington Seafood Company), I  used a dish towel to secure each oyster cupped side down, carefully wedged the tip of an oyster knife into the hinged end, and wiggled the knife to pop open the hinge before sliding the knife across the top shells and slicing the abductor muscles from bottom shells to release the flesh . Being mindful of the precious oyster liquor, I tossed away the top shells and nestled the oysters into a large cast iron skillet layered with chunky rock salt.

 I topped each oyster with 1/4" discs of the chilled compound butter and slid them into a blistering
450 degree oven. When the melted butter bubbled around the slightly curled edges of the oysters ( about 5 minutes), I pulled them from the oven, let them rest, and finished each oyster with a splash of fresh lime juice.

Stained with spice, the  soft oysters poached in the steaming hot butter, gently rendering the slippery raw flesh almost creamy and custard-like. Plumped from the quick blast of heat and teetering on the edge of barely cooked, the brackish oysters popped through the bold overtones of smokey heat. While the fresh lime provided bright acidity to counter the buttery oyster jus, flecks of minced shallot and hot peppers added biting fresh crunch.

Slurp. Suck. Repeat.
Puttin' on the Ritz.


Saturday, December 10, 2016

Roots And Stalks


I'm a celery junkie.
Smear pimento cheese into crisp celery stalks and I'm a happy camper. Pony up a few  nubs side by side with chunky bleu cheese as a side kick for Buffalo chicken wings and I'm set. Spear leafy topped celery sticks into potent bloody marys and color me buzzed. And yes, I plead guilty to swiping snapped off broken pieces of celery through the peanut butter jar, much to Michael's chagrin. All of that said, I'm an absolute fool for long cooked braised celery. Smack a platter of juicy pot roast in front of me and I'm all over the celery, scooting the meat aside for garnish.  It is what it is. My lusty affair with celery.

Celery is a classic flavor building block for almost everything. While we may not even know it's there, we'd know it if it wasn't there. Usually relegated to supporting character, I brought it front and center.

Celery Soup with Horseradish whipped cream.
I kept it simple and clean.

The root of it all.
I trimmed, washed, and chopped 1 large bunch (about 2 pounds) organic celery and set it aside. After slicing 2 large cleaned leeks into thin half moons, I sauteed the leeks in equal parts butter and olive oil (2 tablespoons each). When the leeks started to wilt, I added 1/2 cup chopped Casey County candy onion, 1 clove minced garlic, a pinch white pepper, and flaked sea salt. Just before the onions started to take on color, I deglazed the pan with 1/2 cup white wine, let it reduce by half, and added the reserved celery. For body (in lieu of a starchy potato), I peeled and chopped 1 pound celery root and sliced the attached celery root stalks before tossing them into the pot with the simmering celery. When the wine evaporated, I added 1/2 teaspoon celery salt, 1 teaspoon celery seed, and 6 cups water. I brought the celery stock to a boil, reduced it to a simmer, covered the pot, and let it rip for 40 minutes.

When the vegetables were tender, I used a blender to carefully puree the soup in batches, passed it through a fine sieve to remove the fibrous solids, and returned the velvety soup to the hot pot. I brought the soup to a gentle simmer, splashed it with fresh lemon juice, and added 1/2 cup cream fraiche. After swirling the cream fraiche through the soup. I finished with quenelles of horseradish whipped cream, fresh celery leaves, and slivered radishes.

Drinkable celery.

Simple.
Fresh.
Fabulous.


Tuesday, November 15, 2016

Acorn Squash. Hold The Brown Sugar.

I fall for buttery brown sugar-glazed acorn squash as much as the next guy.  Amping up its inherent sweetness with a sticky caramelized glaze seems to be the go to prep for the pint sized squash.  That said, acorn squash doesn't have to be a one trick pony. Swirling it through a plumped  bread pudding laced with nutty gruyere cheese and sauteed baby kale takes it from to sweet to savory without missing a beat.

Savory Roasted Acorn Squash Bread Pudding 
A fun little riff on a fall favorite.

Squash.
I halved 2 Casey County acorn squash, scooped out the seeds, brushed the flesh with olive oil, and seasoned them with salt and cracked black pepper before placing them cut side down onto a parchment paper-lined sheet pan. After halving a third acorn squash and removing the seeds, I used the ribs as a guideline to slice the squash into half moons, brushed them with olive oil, seasoned them, and fanned them onto a separate parchment-lined sheet pan.

I slid the squash into a preheated 350 degree oven, let them rip for about 45 minutes until they were tender, pulled them from the oven, and set them aside.


Custard.
I sauteed 2 cups finely chopped baby kale in 2 tablespoons olive along with 1 minced shallot, 1/8 teaspoon freshly ground nutmeg, salt, and pepper. When the kale started to wilt, I pulled it from the heat and set it aside to cool.  After beating 4 large eggs until they were frothy, I added 2 cups 1/2 and 1/2, and whisked the two together until they were well incorporated before pouring the custard over 8 cups cubed Sunrise Bakery focaccia bread.

When the squash was cool enough to handle, I slipped off the skins and chopped the softened flesh into 1/2" ragged pieces. After folding the sauteed kale into the pudding mix, I added the chopped squash and 1 cup grated gruyere cheese before ladling the bread pudding into buttered muffin tins (12 muffins) and sliding them into a preheated 375 degree oven. When they puffed up and browned around the edges (about 35 minutes), I pulled them from the oven, ran a sharp knife around the edges to release them from the tins, and brushed the tops with melted unsalted butter.

Still warm and dripping with butter, I nestled the bread puddings onto chopped  baby kale splashed with a lemony vinaigrette before finishing with crunchy pomegranate seeds and a sweet/tart pomegranate  gastrique.

Roasted acorn squash bread pudding.


Fresh.
Perky.
Comforting.

Brown sugar not included.


Sunday, October 30, 2016

Dancing To The Beet.

Hey, over here. I'm over here. Way over here.  I'm the beet loving beet-stained guy dancing on the other side of the invisible line separating beet lovers and haters.  Come on over. Cross the line. It's mighty fine in beet land.

Red. Purple. Golden. White. Candy-striped.
Hidden beneath dirt-caked skins, beets are nature's jewels that radiate deep earthy sweetness. Polarizing to a fault, they bewilder and beguile. I'm beguiled.

Roasted Beet and Goat Cheese Terrine.
Layered and pressed in a terrine, the creamy tang of whipped goat cheese brightens the roasted sweet earthiness of thinly sliced red and golden beets

Beet it.
After washing and trimming 1 pound each red and golden beets, I rubbed the beets with olive oil, seasoned them with salt and pepper,  placed them into separate  aluminum foil packets, added a splash of water to each packet to create steam, sealed the packets, and slid the beets into a preheated 375 degree oven.

When the beets were knife tender, about 50 minutes, I pulled them from the oven, opened the foil to release the heat, and let them rest until they were completely cooled.

When the beets were cool enough to handle, I used paper towels (and gloves) to gently slip the skins from the beets and used a mandolin to slice them into uniform 1/8" cuts.

Whip it.
I brought 10 ounces goat cheese to room temperature, added 3 ounces room temperature cream cheese, 1 tablespoon lemon juice, and 1 teaspoon ground white pepper before using a hand mixer to whip the goat cheese into a creamy spread.

After spraying a  bread tin with cooking spray, I lined the pan with plastic wrap, leaving a 6" overhang on all sides.

I layered the golden beets in double overlapping layers on the bottom of the pan, piped a zig zag flurry of creamed goat cheese onto the beets, drizzled olive oil over the beets, seasoned them with salt and pepper, and repeated the process using alternating layers of golden beets, red beets, and goat cheese.

After gently pressing the beets into the bread tin, I pulled the plastic wrap over the top to seal the terrine, nestled a piece of cardboard trimmed to fit within the sides of the tin, topped the terrine with 2 heavy cans, and slid the terrine into the refrigerator to chill overnight.

With the terrine thoroughly chilled and compressed, I pulled the beet terrine from the refrigerator, removed the plastic wrap, and used a very sharp knife to slice the beets into 3/4" pieces. After trimming the sides for clean edges, I finished with olive oil, flaked sea salt, shelled pistachios, and fresh basil.

Earthy.
Sweet.
Tangy.
Fresh.

Fabulous.


Tuesday, October 18, 2016

Lacquered Up

Michael and I spent our first few Thanksgivings traveling to Washington D.C. for long holiday weekends. Having lived in and around Washington as a kid, the trips felt somewhat like secret homecomings. Back in the day, we had little money, so we made the trips in my beaten up '77 white Granada. As it's been throughout our years together, the journeys were as important as the destination. The visceral memory of our drives through the Shenandoah Valley on gray mid-November days still dance in my head as reminders of simpler times. Cradled by the monotonous rhythm of the road, houses tucked into sweeping meadows slowly passed by our speeding windows. Even from a distance, with car-stuffed driveways and smoke poofs drifting from their chimneys, the houses looked happy. All those thanksgiving families gathered together in all those passing farm houses. Quiet moving postcards.

Over the river and through the woods.
Family homesteads. Family farms.
Grandmother's house.
After abandoning our boyish follies, Michael and I spent the next thirty years traveling over the river and through the woods to share our family holiday gatherings. Separated by hundreds of miles, our families brought vastly different things to the party. Different styles of turkey. Different sides. Different traditions. Time honored on both ends, they were always warm, comforting, and deeply familiar. We held fast until time slowly took its toll.

Nowadays, there are no more rivers and woods. Embracing the mishmash of our combined Thanksgiving traditions, we found our way home. Michael has to have his stuff and I have to have mine. You know, the non-negotiables. We're one dish away from needing a revolving lazy susan to navigate the sides. Win!  And the turkey? No rules. Fair game. Boom.

Cider Brined Lacquered Turkey.
It's coming on Thanksgiving. Pour the bourbon and dress up the turkey.

Brine.
Even a mild brine plumps a bird with moisture and flavor. Bolstered by the abundance of local apple cider, I got apple happy.

After warming 14 cups Evans Orchard apple cider in a large stock pot over a medium flame, I added 1 1/2 cups  Country Rock sorghum, 1 1/2 cups Buffalo Trace bourbon, 6 cups water, 3 tablespoons black peppercorns, 3 bay leaves, 6 whole garlic cloves,, 4 sprigs lemon thyme, and 1 cup kosher salt. When the sugar thoroughly dissolved into the mix, I pulled the brine from the heat and added 6 cups of ice to cool the brine to room temperature.

I lined a clean bucket with a large plastic bag and carefully poured the cooled brine into the bag.  After thoroughly rinsing a 12 pound all natural Amish turkey, I plunged it into the brine, placed a plate over the turkey to keep it submerged, tied the plastic bag together, and slid the turkey into the refrigerator to brine for 24 hours.

Roast.
So, here's the deal. I needed a shallow pan to allow the legs and thighs of the turkey to be exposed to as much circulating heat as possible, so I used a shallow (2" deep) hotel pan. It was deep enough to hold the needed vegetables and liquid, but shallow enough for even heat distribution.

I pulled the turkey from refrigerator, disposed of the brine, rinsed the turkey under cold running water, patted it dry, and set it aside. For an added flavor boost, I combined 2 sticks softened unsalted butter, 1 tablespoon minced fresh sage, 1 tablespoon minced fresh rosemary, 2 tablespoons chopped thyme, and 2 tablespoons chopped fresh parsley before smearing it over the entire turkey. Using the tips of my fingers to loosen the skin from the flesh, I carefully slathered the remaining herbed butter under the skin of the breasts, thighs, and legs. After stuffing the cavity with sliced apples, onions, rosemary, sage, and thyme, I tied the legs together with kitchen twine.

In lieu of a rack, I placed celery stalks and large unpeeled carrots into the hotel pan and positioned the buttered turkey onto the vegetables before scattering 6 whole garlic cloves, 3 quartered Scott County red candy onions, and  4 peeled Casey County Winesap apples to the side. After adding 2 cups chicken stock, 1 cup apple cider, and 1 cup bourbon to the pan, I slid the turkey into a preheated 350 oven.

To baste or not to baste? I'm a baster. As long as the turkey is cooked to the correct temperature ( internal temp 165 deepest part of the thigh), why not bath the skin with the reduced fatty pan drippings?  Basting the turkey roughly every 30 minutes,  I covered the breast with aluminum foil after 1 hour to prevent over browning and continued to baste while checking the internal temperature every 45 minutes or so.


Glaze.
I'm a sucker for a glaze.
It's all about balance.
After reducing 2 cups apple cider by half, I added 3/4 cups sorghum, 3 tablespoons soy sauce, 1/2 cup bourbon, 1/4 cup apple cider vinegar, and 1/4 cup brown sugar. I lowered the heat and let the glaze bubble away until it was the consistency of...well...sorghum. So, think of it as an amplified  boozy apple cider-infused sweet and tart version of sorghum.


Lacquer.
When the turkey reached an internal temperature of 155 degrees (about 2 hours), I started painting every inch of the exposed skin and flesh with the molten sticky glaze.  When the turkey hit 165 degrees, I blasted to heat to 450 degrees, gave the bird a final slather, and popped it back into the oven to burnish the skin before pulling the turkey from the oven to rest for 30 minutes.

After reducing the strained pan drippings into a highly seasoned jus, I nestled the brushed mahogany lacquered turkey onto  fresh greenery, feathered sage, and fresh bay leaves.

Full on savory, the apple cider and sorghum didn't blast the turkey into a candied sugar bomb. The bold double punch of  brine and glaze combined to promote succulent, moist, and tender meat. While the bourbon added mellow smoky vanilla undertones, the acidic bolt of the apple cider vinegar tempered the fruity cider and soft bittersweet earthiness of the caramelized sorghum. Perfect.

Thanksgiving.
Lacquered up.


Monday, October 3, 2016

Kraut

I was practically weaned on sauerkraut. Living in and around Bavaria during my early years with a Czechoslovkian  hotel chef turned nanny sealed the deal with my love for sauerkraut. When we moved back to the States and settled into a small rural town in western Kentucky, some folks took issue with my German birth certificate. Amid the small town ruckus, it didn't take long for kids on the playground to nickname me sour kraut. Kids being kids. Unfazed, I happily wore it as a badge of honor because I was a sauerkraut loving thick-skinned army brat. Bring on the brats.

Several years ago, I helped a dear friend and his family put up their yearly stash of sauerkraut. Following the Farmers Almanac to the letter, they planned their krauting days according to the moon's signs and phases. Holed up in a dimly lit garage in midsummer, the family gathered around and used fantastic old timey equipment to shred bushels and bushels of Casey County cabbage to stuff  hundreds of quart jars for sauerkraut. The fruit of my labor? I could fill as many quart jars that I brought to the party.  At one point, I had over 37 quarts of sauerkraut stacked in our garage. Even for  kraut lover, that's a lot of sauerkraut.

Come midsummer, I always look back on that experience with great fondness. The tea kettle filled with steaming hot water. The archaic shredder mounted onto old barn wood. And the salt. Lots of salt. Basic. Simple. Honest.

Nowadays, I don't need a sauerkraut motherload. With such few ingredients, scratch made small batch sauerkraut is the way to go for a clumsy urban gardener and avid farmers market fan like me.

Small Batch Sauerkraut.
I quart.
1 Jar.
1 tablespoon salt.
2 pounds cabbage.

I trimmed the tattered outer leaves from 2 pounds Scott County green cabbage ( 2 smallish cabbages). After slicing them in half, I removed the cores,  shredded the cabbage with a sharp knife ( a food processor would have made quicker work of it), showered the cabbage with 1 tablespoon kosher salt, and set it aside for 10 minutes. When the cabbage wilted every so slightly, I massaged it for 15 minutes until it broke down and started to release its juices. After packing the cabbage into a clean quart jar. I tamped it down for a tight pack, poured the residual juices into the jar until the cabbage was completely submerged, and topped the jar with a loose fitting lid. I placed the jar in a metal bowl (to catch any gurgling overflow), covered it with a dish towel, and set it in a cool dark place to do its thing for a couple of weeks, checking it every day for mold or obvious spoilage. Keeping the cabbage covered in brine was key.

Although 2 weeks would have been fine, I let it go an extra week for deeper fermentation. It was a simple as that. Boom. Crunchy fresh sauerkraut.


Sausage and Kraut.
With a hints of Bavarian flair mixed with a Bluegrass sensibility, I've prepared sausage and sauerkraut the same way for years, changing up the sausages for variety and fun.  When I stumbled across  house made coiled ropes of beef and pork sausage from Critchfield's Meats, I was totally smitten.

The sturdy bulkiness of the rope sausage belied its delicate nature. Without a little help, the coil would have unfurled into a tangled mess.. After piercing the sausage from end to end with 2 long wooden skewers in quarters to secure the actual coil, I pan seared the sausage in a large cast iron dutch oven (carefully flipping the coil after 5 minutes) until both sides were caramelized and browned. Using two large spatulas, I removed the sausage to a side plate before tumbling 3 slivered shallots and 3 chopped garlic cloves into the spitting sausage fat. When the tips of the shallots started to crisp, I deglazed the pot with 1 cup West Sixth Street Amber Ale, let it reduce to a loose glaze, and added 1 1/2 cups chicken stock.

When the stock reached a rolling simmer, I added 1 quart sauerkraut (with juices), 2 bay leaves, 10 whole juniper berries, 1 tablespoon whole caraway seeds, and cracked black pepper. After swirling 2 1/2 tablespoons dark brown sugar into the simmering kraut, I carefully placed the sausage coil on top of the kraut, slipped halved rainbow carrots to the side, brushed the sausage with olive oil, and slid the dutch oven into a preheated 375 degree oven for 50 minutes, basting the sausage with the pan juices every 15 minutes.

When the internal temperature of the sausage meat reached 165 degrees (thankfully, before it exploded), I pulled it from the oven, let it rest, and finished with quick roasted rainbow carrots tossed with a biting fresh parsley, horseradish, and brown mustard vinaigrette.

Tucked beneath the snappy sausage, the softened brown sugar-laced sweet and sour kraut absorbed the drippings from the meat. While the tender braised carrots added earthy subtle sweetness, the vinaigrette-napped roasted carrots countered the fatty sausage with bright acidic punch.

Bavarian Bluegrass Sausage And Kraut.
A fun twist on a one pot wonder.


Sunday, September 18, 2016

Vines

The arrival of early autumn grapes transports me back to our western Kentucky farm and memories of the grapevines my grandmother grew along the whitewashed wooden fences surrounding her country garden. I loved those grapevines. Gnarled into twisted knots over years of growth, they eventually became part of the fencing, adding another barrier to keep the critters at bay. During the early season, after the leaves unfurled, tiny taut grapes popped from the vines. The young unripened grapes packed a whopping sour punch that only a mischievous transplanted farm boy could love. Bitter, tart, and (technically) off limits, the green grapes were my secret summertime afternoon snack. The original Sour Patch Kids. Nature's candy. I adored and devoured them at any chance. In time, as summer slipped into fall, the grapes slowly ripened into musty blueish-purple concord grapes filled with large crunchy seeds clinging to messy wet pulp. Covered with windswept powdery garden dirt, they were too much work for an undercover grape thief. By then, it was my grandmother's turn with the grapes. With little fanfare, she'd gather what the scavengers hadn't seized to put up unheralded pint jars of jelly and jam to overwinter in the dark dank cellar.

Nowadays, when local grapes quietly sneak into our farmers market and the blistering heat of summer gives way to cooler temperatures, I feel the same gentle shift in seasons from my childhood days on the farm.

Butternut Squash Ravioli with Roasted Mars Grapes, Gorgonzola, and Brown Butter.
While the flavor profile of  butternut squash ravioli splashed with sage-infused brown butter might be the usual route, I took a little detour.

I carefully split two smallish 1 pound Pulaski County butternut squash in half, scooped out the seeds,
rubbed them with olive oil, seasoned them salt and pepper, and placed them cut side down onto a parchment paper lined sheet pan.

After thinly slicing 3 medium sized Casey County red onions, I feathered them into a glass mixing bowl along with 1 pint Woodford County seedless purple Mars grapes. I drizzled everything with olive oil before adding salt and pepper. After  scattering the grapes and onions around the butternut squash, I slid the sheet pan into a preheated 400 degree oven for 40 minutes, turning the, grapes, and onions half way through.

When the onions caramelized and the grapes were on the brink of collapse, I pulled everything from the oven to rest

Filling.
I scooped the cooled softened squash flesh into a food processor (about 1 1/2 cups), added 1/2 cup mascarpone cheese, 1/3 cup grated parmigiano-reggiano cheese, 3 ounces creamy gorgonzola cheese, 1/3 of the roasted red onions, salt, and pepper. After blending the mix until velvety smooth, I set it aside to cool.

Pasta.
I typically roll with a delicate egg based pasta dough, but went with a sturdier combination of
semolina flour, 00 flour, and eggs for structure.

I spooned 1 cup semolina flour into the bowl of a food processor, added 1/3 cups 00 flour (bread flour would have been fine) 2 large eggs, 1 tablespoon olive oil, and salt. With the motor running, I drizzled about 1 tablespoon ice water into the mix and let it rip until it formed a ball around the blade. After scooping the dough out onto a floured board, I kneaded the dough for a few minutes, wrapped it in plastic wrap, and set it aside to rest for 10 minutes.

I cut the dough into 4 pieces and covered them with a clean dish towel. Working with 1 quarter at a time, I flattened the dough with the palm of my hand until it was about 1/2' thick and fed it through the widest setting of a pasta machine  4 times, folding it in half after each pass. When the dough was smooth and pliable, I passed it through the rollers while decreasing the setting after each pass. Stopping shy of the last setting, I placed the pasta onto floured parchment paper and repeated the process with the remaining dough until I had 4 very long pasta sheets. I trimmed them up, and squared them off, covered them with a dish towel, and poured myself a glass of wine.


The fun part.
With the pasta dough on deck, I spooned dollops of the butternut squash filling down the center of half the pasta sheets, brushed an egg wash between the dollops, draped the remaining pasta sheets over the bottom layers, carefully pressed out any air pockets, cut the filled pasta with a round ravioli stamp, and set them aside.

After a quick rest, I dropped the ravioli into a large  pot of salted boiling water, let them rip until they floated to the top, and scooped them out onto a dish towel to drain.

Brown Butter.
Quick fire. Less is more. Brown butter can turn ugly in the blink of an eye. After melting 1/2 cup unsalted butter in a heavy saucepan, I cranked the heat to medium high, let the butter foam up, settle down, and pulled it from the heat.

I nestled the ravioli into puddles of the toasted brown butter, drizzled a bit more over the top, and tucked the reserved roasted grapes to the side before finishing with crumbled gorgonzola cheese, caramelized onions, fresh lemon thyme, and swirls of roasted grape jus.


Simple flavors.
Unexpected.
Familiar.

Fabulous.


Friday, August 26, 2016

Bourbon Bells

It might be hard to remember a time when the Kentucky Bourbon Trail didn't meander through the Bluegrass connecting local distilleries through common ground or when there was no Kentucky Bourbon Festival celebrating all things bourbon. Right now, (along with horses and basketball) they're both part of our cultural heritage. Funny, long before the Bourbon Trail was established (1999) and distilleries  built multi-million dollar visitor centers with chef driven eateries to accommodate the exploding bourbon tourism industry or before the Kentucky Bourbon Festival (1992) cemented itself as the center of the bourbon universe during its run, I was helping bang out bourbon dinners at a restaurant in downtown Lexington. Back in the day, bourbon dinners were a novelty and not a thing.  At the time, our restaurant happened to have a very large bourbon selection and when we were approached about hosting a bourbon tasting/dinner, we jumped all over the opportunity. With little experience and unbounded naivete, we kept the dinners very simple until they gained popularity and the notion took hold. Nowadays, bourbon dinners are indeed a thing. The notion stuck. Over the years, with single barrel bourbons, small batch bourbons, blended barrels, and craft bourbons crashing the party, bourbon dinners (and bourbons) have gotten more complex and sophisticated. It's a good time to be a bourbon lover.

The Kentucky Bourbon Festival started out in 1992 as a dinner with a bourbon tasting. Every year, it played on its popularity until it skyrocketed into a two week event that draws over 50,000 attendees a year to the beautiful town of Bardstown, Kentucky. Bourbon mania.

16 years after that inaugural dinner and bourbon tasting, I found myself teaching, cooking, and demonstrating a 5 course bourbon inspired meal for 250 bourbonites at  The Culinary Arts; Bourbon Style Cooking School at the Kentucky Bourbon Festival. Full circle.

I have a tender spot for my two year stint teaching the bourbon cooking school. Oh sure, planning, prepping, traveling, and cooking in an archaic  portable makeshift kitchen had its challenges, but it was always great fun. With the festival just around the corner, I can still feel how my nervous excitement swelled and calmed moments before service when the bell tower chimed My Old Kentucky Home through the serene shaded grounds of My Old Kentucky Home State Park. Cue the music and light the burners. Lucky Kentucky boy.

With smoky undertones from the charred barrels blending with subtle notes of vanilla, spice, caramel, honey, and oak, the inherent qualities of bourbon lend themselves readily to both sweet and savory preparations. While I've applied it to just about everything, bourbon's natural affinity with pork gets me every time.

Slow Roasted Bourbon Lacquered Pork.
With a few tweaks, I ventured back to the simplicity of my first bourbon dinner with an easy going preparation. Time. Little effort. Big payoff.

Brine.
To jump start the bourbon factor, I made a quick brine with 1 cup hot water, 2 cups cold water 4 tablespoons Maker's Mark bourbon, 1 tablespoon olive oil, 3 tablespoons salt, and 3 tablespoons brown sugar. After chilling it down with 1 cup crushed ice, I poured it over a 4 1/2 pound Rolling Rock Farm Boston Butt pork roast, massaged it into the meat, and slid it into the refrigerator to marinate/brine overnight.

Slather and rub.
The next day, I pulled the pork from the refrigerator, drained the brine, patted the pork dry, and slathered it 1 cup bitingly sharp Maille dijon mustard. While the pork roast came to room temperature, I mixed 1 1/2 cups dark brown sugar with 1 tablespoon onion powder, 1 tablespoon garlic powder, 1 tablespoon smoked paprika, 1/2 tablespoon ground cumin, 1/2 tablespoon dried thyme, 3 tablespoons Bourbon Barrel Smoked Bourbon Sea Salt, 1 tablespoon kosher salt, and 2 tablespoons freshly cracked black pepper.

After massaging and packing the spiced brown sugar rub onto every inch of the pork roast, I scattered
sliced Casey County candy onions into a large roasting pan, nestled the pork roast over the onions, added 1 1/2 cups chicken stock, and 1/2 cup bourbon before sliding the roast (uncovered) into a preheated low 325 degree oven for 4 1/2 - 5 hours, basting the meat with the pan juices every 45 minutes and adding stock when needed.

As the fat melted into the meat, it swirled through pan juices, sticky candied spice rub, and bourbon
spiked stock. Think about it.  It was a basting dream. Even at a low oven temp (with that much sugar action) I kept a close eye on the pan drippings, adding more liquid/bourbon when needed. Baste. Wait. Baste.  Repeat.

When the internal temperature of the pork reached 190 degrees and it was beautifully smothered, covered, and lacquered, I pulled the roast from the oven, tented it foil, and let it rest for 25 minutes.

After 5 hours, the pan juices were highly concentrated. To loosen them up a bit, I slid the roasting pan over 2 stove top burners, turned the heat to medium, and added a scant 1 tablespoon flour. When the flour bubbled up, I soften the sauce with 1 cup chicken stock, 1/2 cup water, 1 tablespoon dijon mustard, and an extra  splash of bourbon to perk it up.

I ripped  thick shards of pork from the sticky burnished roast, nestled them into puddles of smoky sweet bourbon  pan sauce, and tucked buttered Wiesenberger Mills cornbread waffles to the side before finishing with fresh grassy parsley, slivered Casey County sweet red banana peppers, bright quick-pickled shallots, and pickled garlic cloves.

I'll drink to that.


Saturday, August 20, 2016

Spin

Zucchini fatigue.
This time of year can get to people. I know some folks who absolutely hit the wall every summer when the zucchini goes wild and keeps rolling in. Year after year, without a shred of hindsight, my father planted rows and rows of zucchini in his enormous garden only to regret the eventual overload. When he let the late season zucchini grow into giant green footballs, we knew he'd found his wall. Even a few backyard plantings can test the bounds of patience for well meaning urban gardeners. With a few unsuccessful attempts under my belt trying to grow zucchini, my one little brush with zucchini fatigue occurred several years ago when a housemate of ours hammered Michael and me with a relentless summer long onslaught of zucchini bread, zucchini muffins, and zucchini everything. Although it took us a couple of years to recover from that unfortunate and wearisome zucchini-palooza, I never held it against the vegetable. In fact, I adore zucchini.  Luckily, for most of us, our local farmers tolerate the crazy to bring the overabundance to our farmers' markets until the bitter end. Grow it and I will come. For a different take on the seasonal powerhouse, I paired a recent haul with a few other summer favorites and took them all for a little spin. A literal spin.

Summer Vegetable Tart.

Crust.
To dough or not to dough?
In lieu of a lovely cheese-flecked savory shortbread crust, I opted to run with a very basic unstructured pastry dough.

I pulsed 1 1/4 cups flour, 1 teaspoon salt, and 1/2 teaspoon freshly ground black black pepper in a food processor. When combined, I added 8 tablespoons ( cut into pieces) cold unsalted butter and processed the mixture until it resembles course crumbs. With the machine running, I drizzled ice cold water one tablespoons at a time (about 3, total ) until it formed a loose ball. After transferring the dough to a floured board, I flattened it into a disc, wrapped in in plastic wrap, and slid it into the refrigerator to chill for an hour.

After rolling out the dough on a floured board until it was 1/4" thick, I carefully placed it into an 8" buttered spring form pan and nudged the dough into the pan. Without being too fussy, I maneuvered the dough to form a rustic base, docked it with a fork, covered it with parchment paper, filled the shell with beans, blind-baked the shell for 15 minutes  in a preheated 350 degree, and pulled it from the oven to cool.

Ribbons.
I could have used a mondolin to achieve uniform shaved vegetable greatness,but I really didn't want
get all precious with the prep. Using a vegetable peeler, I shaved  2 Large carrots, 3 slender Boyle County Asian eggplants, 3 large Elmwood Stock Zucchini, and 3 large Elmwood yellow squash into feathery ribbons.

With most everything on deck, I whipped 8 ounces room temperature cream cheese, 1 tablespoon fresh lemon zest, 1 teaspoon salt, 1/2 teaspoon onion powder, and cracked black pepper until blended before spreading the creamed cheese over the bottom of the cooled tart shell.

Spin.
There were multiple ways I could have wrapped the vegetables around each other to create the spiral. Basically, I twirled.  After forming a teeny rosette with a carrot ribbon, I  used the natural moisture from the vegetables to help them adhere  and simply twirled them them around each other, alternating the layers with zucchini, yellow squash, eggplant, and carrot ribbons. When it became a little loosey-goosey, I placed the spiral onto a plate and continued twirling until it was large enough too fit into the par-baked cream cheese covered tart shell. I carefully slid the vegetable ribbon spiral into the shell, tucked it into place, and gently nestled the vegetables into the flavored creamed cheese. After drizzling the top with extra virgin olive oil, I slid the tart into a pre-heated 350 oven for 35 minutes.

Before the delicate edges of the vegetables over caramelized (charred), I pulled the tart from the oven, let it rest for 15 minutes, released it from the spring form pan, and slid it onto a wire rack to cool.

When cooled to room temperature, I kissed the vegetables with a splash of fresh lemon juice and a dusting of flaked sea salt,

Give it a spin.
No walls.


Spin

Zucchini fatigue.
This time of year can get to people. I know some folks who absolutely hit the wall every summer when the zucchini goes wild and keeps rolling in. Year after year, without a shred of hindsight, my father planted rows and rows of zucchini in his enormous garden only to regret the eventual overload. When he let the late season zucchini grow into giant green footballs, we knew he'd found his wall. Even a few backyard plantings can test the bounds of patience for well meaning urban gardeners. With a few unsuccessful attempts under my belt trying to grow zucchini, my one little brush with zucchini fatigue occurred several years ago when a housemate of ours hammered Michael and me with a relentless summer long onslaught of zucchini bread, zucchini muffins, and zucchini everything. Although it took us a couple of years to recover from that unfortunate and wearisome zucchini-palooza, I never held it against the vegetable. In fact, I adore zucchini.  Luckily, for most of us, our local farmers tolerate the crazy to bring the overabundance to our farmers' markets until the bitter end. Grow it and I will come. For a different take on the seasonal powerhouse, I paired a recent haul with a few other summer favorites and took them all for a little spin. A literal spin.

Summer Vegetable Tart.

Crust.
To dough or not to dough?
In lieu of a lovely cheese-flecked savory shortbread crust, I opted to run with a very basic unstructured pastry dough.

I pulsed 1 1/4 cups flour, 1 teaspoon salt, and 1/2 teaspoon freshly ground black black peeper in a food processor. When combined, I added 8 tablespoons ( cut into pieces) cold unsalted butter and processed the mixture until it resembles course crumbs. With the machine running, I drizzled ice cold water one tablespoons at a time (about 3, total ) until it formed a loose ball. After transferring the dough to a floured board, I flattened it into a disc, wrapped in in plastic wrap, and slid it into the refrigerator to chill for an hour.

After rolling out the dough on a floured board until it was 1/4" thick, I carefully placed it into an 8" buttered spring form pan and nudged the dough into the pan. Without being too fussy, I maneuvered the dough to form a rustic base, docked it with a fork, covered it with parchment paper, filled the shell with beans, blind-baked the shell for 15 minutes  in a preheated 350 degree, and pulled it from the oven to cool.

Ribbons.
I could have used a mondolin to achieve uniform shaved vegetable greatness,but I really didn't want
get all precious with the prep. Using a vegetable peeler, I shaved  2 Large carrots, 3 slender Boyle County Asian eggplants, 3 large Elmwood Stock Zucchini, and 3 large Elmwood yellow squash into feathery ribbons.

With most everything on deck, I whipped 8 ounces room temperature cream cheese, 1 tablespoon fresh lemon zest, 1 teaspoon salt, 1/2 teaspoon onion powder, and cracked black pepper until blended before spreading the creamed cheese over the bottom of the cooled tart shell.

Spin.
There were multiple ways I could have wrapped the vegetables around each other to create the spiral. Basically, I twirled.  After forming a teeny rosette with a carrot ribbon, I  used the natural moisture from the vegetables to help them adhere  and simply twirled them them around each other, alternating the layers with zucchini, yellow squash, eggplant, and carrot ribbons. When it became a little loosey-goosey, I placed the spiral onto a plate and continued twirling until it was large enough too fit into the par-baked cream cheese covered tart shell. I carefully slid the vegetable ribbon spiral into the shell, tucked it into place, and gently nestled the vegetables into the flavored creamed cheese. After drizzling the top with extra virgin olive oil, I slid the tart into a pre-heated 350 oven for 35 minutes.

Before the delicate edges of the vegetables over caramelized (charred), I pulled the tart from the oven, let it rest for 15 minutes, released it from the spring form pan, and slid it onto a wire rack to cool.

When cooled to room temperature, I kissed the vegetables with a splash of fresh lemon juice and a dusting of flaked sea salt,

Give it a spin.
No walls.


Saturday, July 30, 2016

Char

Whether broiled, deep fried, baked, grilled, pan fried, simmered, or stewed, eggplant is a very versatile member of the nightshade family that takes a winning spin with almost any preparation. That said, nothing develops the earthy custard-like creamy meatiness of eggplant more than a down and dirty char.


Right now, tomatoes and eggplant are more than abundant at our local farmers' markets. Strewn across the farm tables with other gorgeous high-season produce, rows and rows of heirloom tomatoes line up side by side with baskets of eggplant varieties splashing the markets in sweeping vibrant colors. It's a bit overwhelming, humbling, and altogether beautiful.


Summer fun.
What grows together, goes together.

Charred Eggplant Salad with Roasted Tomato Vinaigrette.
Sure, a broiler or stove top open gas flame would have been dandy for a fine blistered skin with softened inner flesh. Sometimes, more is more. I went the full monty with a full out char.

After igniting charcoal in an outdoor grill, I let the coals crumble into glowing embers before cradling slender Pulaski County White Casper, striped Boyle County Fairy Tale, and bulbous Casey County Black Beauty eggplant varieties into the burning coals.  I poured a glass of wine, pulled up a chair, and used long handled tongs to turn the eggplant every 15 minutes or so until they started to blister, collapse, and blacken. More is more. I let them go another 15-20 minutes (turning them often) until they were ridiculously charred before carefully lifting them from the grill, placing them over a wire rack, gently slipping off their burned brittle skins, and setting the naked eggplant flesh aside.


While the eggplant cooled, I placed 1 1/2 pounds of on-the-vine Marion County tomatoes into a cast iron skillet, drizzled them with olive oil, seasoned them with a dusting of kosher salt along with a few grinds of cracked black pepper, and slid the tomatoes into a preheated 400 degree oven for 20 minutes. Just before the tomatoes imploded, I pulled them from the oven and set them aside.

Fire and Nice.
When the roasted tomatoes were cool enough to handle, I removed them from the cast iron skillet, reserved a few whole tomatoes, and grated the remaining ones on a box grater fitted over a sturdy bowl (old school). After pressing the juicy pulp through a fine mesh strainer, I scraped the good stuff from the bottom of the strainer and stirred it into the tomato jus before adding 1 tablespoon fresh squeezed lemon juice, 2 tablespoons olive oil, salt, and cracked black pepper to form a loosey-goosey broken vinaigrette ( roughly, 3/4 cup tomato jus, 1 tablespoon lemon juice, 2
tablespoons olive oil, salt and pepper to taste).

With everything at room temperature, I nestled the creamy eggplant (halved or left whole, depending on size and variety) into puddles of the roasted tomato vinaigrette and rested the reserved whole roasted tomatoes to the side before finishing with fresh Green Tiger tomatoes, baby Sun Golds, extra virgin olive oil, flecked feta, and snipped garden chives.

Kissed with smoke, the char-steamed eggplant flesh melted into the tomato jus. With a mere whisper the whole roasted tomatoes split open, giving texture and body to the vinaigrette.  Brightened by the fresh lemon and rounded out with fruity olive oil, the broken vinaigrette masqueraded as a wonderful and refreshingly light tomato sauce. An accidental summer win. While the fresh baby heirlooms countered the warm depth of the roasted tomatoes, the chive/feta combo crashed the tomato-eggplant party with brash grassy sharp tang. Flavor bombs.

Charred eggplant with summer tomatoes.

Fresh from the ashes.

Fabulous.


Saturday, July 16, 2016

Brambles

Blackberry picking was a noble chore on our family farm in western Kentucky. During those blistering hot midsummer days, there were blackberries to be had and someone had to pick them. It was a rough and tumble business. You see, we didn't grow blackberries on our old Kentucky farm. They simply arrived.  Our blackberries grew in places my father's bush hog couldn't reach or mow. The tangled prickly brambles twisted through overgrown barbed wire fence rows, corner thickets, rugged ravines, crumbling abandoned farm buildings, and camouflaged critter camps. I was the fetcher of the blackberries. Ever mindful to leave the top berries for the birds while rustling up enough noise to ward off snakes, I was the hunter and gatherer of the summer field berries. Outfitted in long sleeved flannel shirts, heavy socks, and rolled up dungarees for protection, my pretend armor was a suffocating ruse. After every expedition, without fail, I hobbled home with ankle-high cockelburs, chiggers, deep scratches, bloody hands, and blackberries. A big win for an adventurous farm boy. During the weeks of blackberry season, the fruits of my labor brought on summer cobblers, pies, muffins, pancake syrups, and macerated ice cream sauces. For those few fleeting weeks, I felt like the noble prince of summer.

Nowadays, I leave the picking to our hard working farmers. See you later snakes, thorns, chiggers, and bloody heat. Hello, sweet plump summer blackberries. Ripe for the picking at our local farmers' markets.

Goat Cheese Cheesecake With Blackberry Basil Coulis
 Any fruit or berry would pair beautifully with goat cheese cheesecake. Right now, blackberries are having their moment in the sun.

Coulis
I tumbled 1 pint Pulaski County blackberries into a saucepan, added 1/3 cup sugar, 1 tablespoon fresh squeezed lemon juice, a pinch ground white pepper, and 3 whole fresh basil leaves. After cranking the heat to medium high to melt the sugar, I reduced the heat to a simmer  and let it rip until the berries collapsed from the heat. When the blackberries released their juices and disintegrated into the sauce, I pulled the coulis from the heat, strained it through a fine mesh strainer, discarded the basil-flecked  pulp, and set the coulis aside. to cool.

Crust.
To add a subtle savory bent, I crushed 3 tablespoons shelled pistachios in a food processor before tossing them with 1/2 cup graham cracker crumbs and 3 tablespoons melted butter. After buttering 8 individual 4 ounce ramekins, I spooned the crumb mixture into each ramekin, tamped the buttered crumbs firmly into the edges, slid the ramekins into a 325 degree oven for 8 minutes, and pulled them from the oven to cool.

Filling.
A fun little ride on the wild side.
After bringing 11 ounces cream cheese and 4 ounces goat cheese to room temperature, I tossed the two cheeses into a stand mixer. Using the paddle attachment, I beat the cheeses together for 2 to 3 minutes before adding 2 Elmwood Stock Farm eggs (one at a time until incorporated), 1 tablespoon fresh lemon zest, 1 tablespoon fresh lemon juice, 1 teaspoon pure vanilla extract, 2 tablespoons sour cream, and a pinch of salt. To insure maximum creaminess, I beat the filling on medium speed for 10 full minutes before carefully filling each buttered cup. After placing the ramekins into a hot water bath, I carefully slid them into a preheated 300 degree oven for 24 minutes, pulled them from the oven, let the cheesecakes rest in the water bath for 10 minutes, and  transferred them to a wire rack to cool completely before sliding them into the refrigerator to chill overnight.

After bringing the cheesecakes to room temperature, I dipped the ramekins into hot water to loosen
the crusts, ran a sharp knife around the edges to release the fillings, and inverted them crust side up to serve on puddles of coulis with fresh blackberries and garden basil leaves.

Both bold and delicate, the salty sweet crunch of the pistachio crust countered the soft creamy tang of the goat cheese cheesecake. While the basil-infused berry coulis provided a tart bright punch, the plump fresh blackberries added warming sweet pops of summer.

Simple.
Fresh.
Unexpected.

Summer berries.
Savor the season.


Brambles

Blackberry picking was a noble chore on our family farm in western Kentucky. During those blistering hot midsummer days, there were blackberries to be had and someone had to pick them. It was a rough and tumble business. You see, we didn't grow blackberries on our old Kentucky farm. They simply arrived.  Our blackberries grew in places my father's bush hog couldn't reach or mow. The tangled prickly brambles twisted through overgrown barbed wire fence rows, corner thickets, rugged ravines, crumbling abandoned farm buildings, and camouflaged critter camps. I was the fetcher of the blackberries. Ever mindful to leave the top berries for the birds while rustling up enough noise to ward off snakes, I was the hunter and gatherer of the summer field berries. Outfitted in long sleeved flannel shirts, heavy socks, and rolled up dungarees for protection, my pretend armor was a suffocating ruse. After every expedition, without fail, I returned with ankle-high cockelburs, chiggers, scratches, bloody hands, and blackberries. A big win for an adventurous farm boy. During the weeks of blackberry season, the fruits of my labor brought on summer cobblers, pies, muffins, pancake syrups, and macerated ice cream sauces. For those few fleeting weeks, I felt like the noble prince of summer.

Nowadays, I leave the picking to our hard working farmers. See you later snakes, thorns, chiggers, and bloody heat. Hello, sweet plump summer blackberries. Ripe for the picking at our local farmers' markets.

Goat Cheese Cheesecake With Blackberry Basil Coulis
 Any fruit or berry would pair beautifully with goat cheese cheesecake. Right now, blackberries are having their moment in the sun.

Coulis
I tumbled 1 pint Pulaski County blackberries into a saucepan, added 1/3 cup sugar, 1 tablespoon fresh squeezed lemon juice, a pinch ground white pepper, and 3 whole fresh basil leaves. After cranking the heat to medium high to melt the sugar, I reduced the heat to a simmer  and let it rip until the berries collapsed from the heat. When the blackberries released their juices and disintegrated into the sauce, I pulled the coulis from the heat, strained it through a fine mesh strainer, discarded the basil-flecked  pulp, and set the coulis aside. to cool.

Crust.
To add a subtle savory bent, I crushed 3 tablespoons shelled pistachios in a food processor before tossing them with 1/2 cup graham cracker crumbs and 3 tablespoons melted butter. After buttering 8 individual 4 ounce ramekins, I spooned the crumb mixture into each ramekin, tamped the buttered crumbs firmly into the edges, slid the ramekins into a 325 degree oven for 8 minutes, and pulled them from the oven to cool.

Filling.
A fun little ride on the wild side.
After bringing 11 ounces cream cheese and 4 ounces goat cheese to room temperature, I tossed the two cheeses into a stand mixer. Using the paddle attachment, I beat the cheeses together for 2 to 3 minutes before adding 2 Elmwood Stock Farm eggs (one at a time until incorporated), 1 tablespoon fresh lemon zest, 1 tablespoon fresh lemon juice, 1 teaspoon pure vanilla extract, 2 tablespoons sour cream, and a pinch of salt. To insure maximum creaminess, I beat the filling on medium speed for 10 full minutes before carefully filling each buttered cup. After placing the ramekins into a hot water bath, I carefully slid them into a preheated 300 degree oven for 24 minutes, pulled them from the oven, let the cheesecakes rest in the water bath for 10 minutes, and  transferred them to a wire rack to cool completely before sliding them into the refrigerator to chill overnight.

After bringing the cheesecakes to room temperature, I dipped the ramekins into hot water to loosen
the crusts, ran a sharp knife around the edges to release the fillings, and inverted them crust side up to serve on puddles of coulis with fresh blackberries and garden basil leaves.

Both bold and delicate, the salty sweet crunch of the pistachio crust countered the soft creamy tang of the goat cheese cheesecake. While the basil-infused berry coulis provided a tart bright punch, the plump fresh blackberries added warming sweet pops of summer.

Simple.
Fresh.
Unexpected.

Summer berries.
Savor the season.


Sunday, July 3, 2016

The Boys Of Summer.

"How do you measure a year?
 In daylights, in sunsets,
 In midnights, in cups of coffee,
 In inches, in miles, in laughter, in
 strife." -Seasons Of Love. RENT

During the 1980's, The AIDS epidemic  struck the core of Key West. Even through the difficult times, the small island community still knew how to party and celebrate life. We joined the party for a couple of weeks in the summer of '87 to celebrate our 3rd anniversary. Innocent times.

July 4th, 1987. Key West, Florida.

Hot days. Hot Havana nights.

After spending the week prior to the 4th drinking like locals, inhaling deep sunsets, dancing until dawn, devouring conch, fresh seafood,  Key Lime tarts, and Cuban fare, Michael and I found ourselves smack dab in the middle of the annual July 4th city-wide picnic benefiting the Key West Visiting Nurses Association And  Hospice. It was a grand affair that bonded the community together with heartfelt purposeful common goals.  As the somber and uplifting picnic wound down, the antsy crowd shuffled en masse to the White Street Pier for the real party. Bedecked from head to toe in matchy matchy beachwear, we joined the throngs of gays on the massive concrete slab.

The first section of the White Street Pier had been parlayed into an elaborate discotheque with a dance floor, sound system, lights, and multiple bars. Jutting several hundred yards out into the Atlantic Ocean, the heavy stark pier seemed to float above the water under the weight of throbbing smooth skinned boys dancing in the heat of the sun. Hot. Wild. Free.

When the sun crashed into the sea, pulsing multi-colored lights painted the wet bodies of our thumping tribe while submerged lights beneath the pier reflected undulating silhouettes of graceful stingrays silently gliding through the water like lost sunken kites. Mesmerizing and beautiful.

Poof.
Without warning, in the distance, wispy fireworks shot into the sky from an invisible barge anchored out in the ocean far from the pier. Flickering. Fluttering. Twinkling. Falling. As the fireworks grew louder and more intense, the fiery rain shattered the black sky with blazing thunderous light. Suddenly, silence swept over the pier before a deafening recording of Kate Smith's "God Bless America"  blasted through the darkness and washed across the quiet black water, spilling onto the boys of summer. It. Was. Glorious.

It took a few fun filled days to recover from Kate Smith, the stingrays, the sun, our anniversary, and the concrete pier. On our final night in Key West, we bellied up to a walk-up food shack on Duval Street, ordered Cuban pork with yellow rice, dangled our legs off the dock of Mallory Square, and absorbed the sunset.

 Happy.


How Do You Measure A Year?


Friday, June 10, 2016

Ducks In A Row

Several years ago, in a desperate effort to escape the suffocating summer heat of New York City and my non air-conditioned 4th floor walk up apartment in Hell's Kitchen, I  rented a cheap car and blasted out of the city for a day trip to the Hamptons on Long Island. Without an agenda or schedule, I simply wanted to get as far away from New York as possible. I hadn't driven a car in years, so managing the expressways, exits, bridges, and tunnels out of New York was a stretch, to say the least. Once I made it safely out of the tangled mess and onto Highway 27 (Montauk Highway), a calm blew over me like a gentle cool breeze. Without a care in the world, I spent the day driving, beach hopping, and soaking in the countryside.

With time melting away, a late afternoon mist echoed my melancholy as I made the turn to return home.  Hoping to squeeze more time out of the day, I pulled into what appeared to be a rundown roadside restaurant. Swallowed by the shadows of overhanging pine trees and draped in a faux tudor-style facade, the restaurant seemed to be lost in time. Embracing its time worn sensibility, a low fire burned in a cobblestone fireplace next to tufted half moon leather banquettes surrounded by empty white tablecloth covered tables. Summer in the Hamptons, I thought. Snugly tucked into one of the enormous scalloped banquettes and feeling decades older than my 22 years, I tasted my first bite of duck confit. Stained with a brooding red wine reduction and splayed over a simple potato puree, that old world succulent duck confit forever anchored my crush on crispy unctuous fat. Yep.

Confit: confire or to preserve.
Cured with salt, poached in duck fat, cooled, and stored beneath a layer of fat, duck confit was and is an old school method for preserving cooked duck without refrigeration for long periods of time. Nowadays, without the need for long term preservation, the method is used mostly as a tenderizer and flavor enhancer.

Once cooked and chilled, duck confit is wildly versatile. Whether served over duck fat fried potatoes, stuffed into tacos, shredded onto wood fired pizza, sauced with pasta, tucked into cassoulets, or packed into rillettes, duck confit is a glorious concentrated fat forward flavor bomb.

While simple to prepare, duck confit takes time. Like a slow meandering drive through the backroads
of the Bluegrass, the journey is worth savoring.

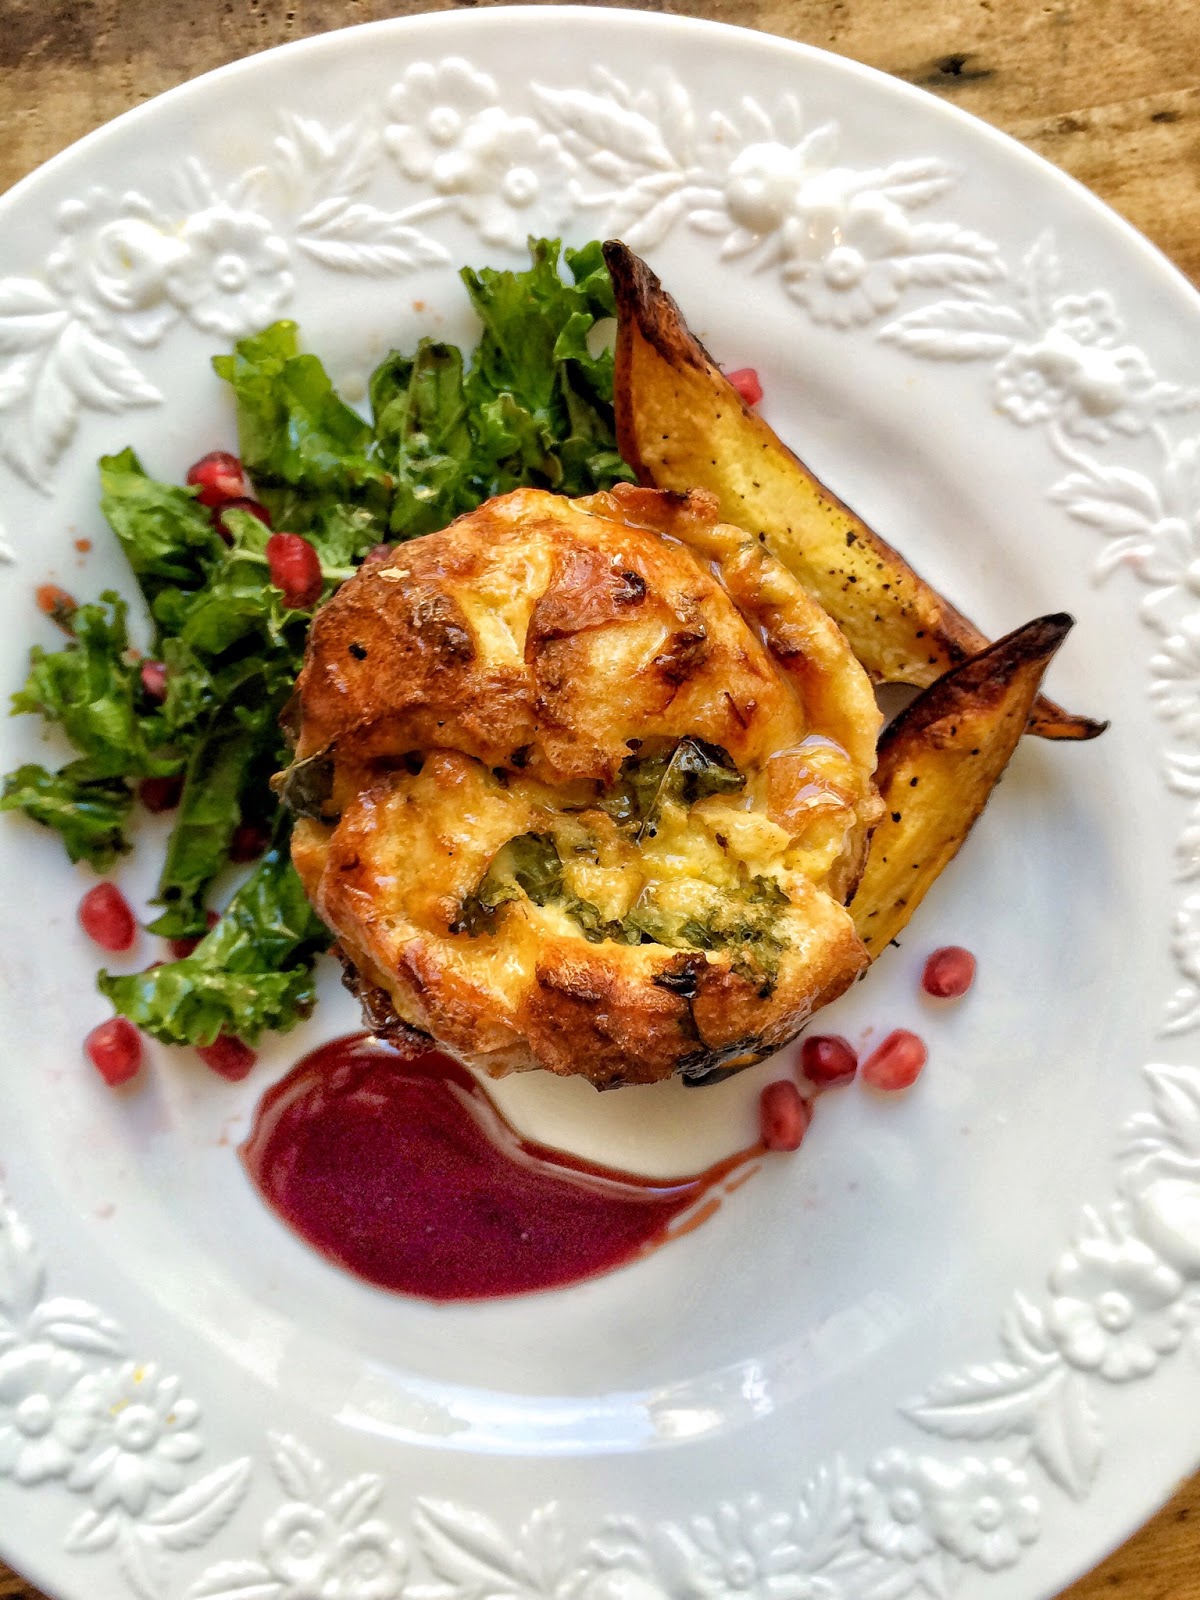
Duck Confit Summer Market Salad.
While whole ducks, breasts, and thigh/leg quarters are readily available at most supermarkets or specialty food shops, I was a very happy boy when I stumbled across locally raised whole Peking ducks offered up by Farmer Joe from Salvisa, Kentucky at the Chevy Chase Farmers' Market. I snagged two plump birds.

The Breakdown.
Working with one thigh/leg quarter at a time, I sliced the skin between the legs and breasts from each duck, pulled the legs back to snap the bones, sliced through the connecting tissues and joints, ripped the thigh/leg quarters from the birds, set them aside, and repeated the process until all 4 quarters were dispatched.

I took a gentler approach with the breast meat. After making long slices down each side of the breastbones, I carefully pulled the meat away from the bones while making long slicing passes down the rib cages until the meat fell away from the breastbones, leaving visible fat lines as guidelines as to where to slice the breast meat away from the birds. After repeating the breast cuts for all 4 breasts, I set the breasts aside and trimmed the remaining fat from each duck before stashing the carcasses and breast meat in the freezer. I tossed the reserved fat into a cast iron skillet set over a medium flame, slowly rendered the fat for 1 hour and 45 minutes, strained the fat, set it aside to cool, and slid it into the refrigerator to chill.

The Cure.
After snipping the tendons at the tips of the each leg to release the skin, I showered the duck quarters with 3 1/2 tablespoons kosher salt, tossed them into a bowl with a few sprigs of fresh thyme, 5 cloves of smashed Jessamine County garlic cloves, and cracked black pepper. I massaged the salty cure into the meat, covered the bowl with plastic wrap, and placed the duck into the refrigerator to cure for 24 hours.

The Fat Tub.
I pulled the cured duck quarters from the refrigerator, rinsed off the salt, patted them dry with a dish towel, and set them aside. After warming 4 cups duck fat ( 2 cups rendered combined with 2 cups purchased from Critchfield Meats) in a large cast iron dutch oven, I submerged the duck pieces in the melted fat, brought the heat to a rippling simmer, and slid the dutch oven (uncovered) into a preheated 235 degree oven for 2 1/2 hours. When the meat was knife tender, I carefully lifted the quarters out of the molten fat, gently placed them into a deep dish, strained the hot fat through a fine mesh strainer, ladled the cleaned fat over the duck, and let the fat cool before sliding the confit into the refrigerator to chill overnight.

Duck. Fat. Duck.
The Salad.
I gingerly plucked the duck quarters  out of the congealed fat (while leaving some fat clinging to the pieces), slipped them into a large cast iron skillet skin side up, and slid the skillet into a preheated 350 oven to warm through and crisp.

I have a thing for glazes. I spooned 4 tablespoons sugar into small cast iron skillet set over a medium flame. When the sugar started to caramelize, I hit the bubbling browned sugar with 4 tablespoons sherry vinegar and let it rip until the combination slowly relaxed and melted into a glossy sweet and tart gastrique.

After 25 minutes, I pulled the crispy duck quarters from the oven, brushed them with the gastrique, and set them aside to rest.

I tossed hand torn Stonehedge Farm feathery baby mustard greens and  julienned Marion County raw baby yellow squash with a bracing dijon vinaigrette ( 3 tablespoons dijon, 3 tablespoons vinegar, 6 tablespoons extra virgin olive oil, salt, and crfacked black pepper). After nestling the duck confit over the greens, I scattered roasted Stonehedge Farm baby fennel to the side before finishing with quick pickled Boyd County radishes, steamed Casey County baby beets, and Boyle County cherry tomatoes.

Tucked under the ridiculously tender confit, the peppery greens and sharp vinaigrette cut through the haunting richness of the lacquered duck. While the chilled earthy beets, halved tomatoes, and snappy yellow squash added fresh pops, the quick pickled radishes provided acidic biting crunch.


Sassy.
Fresh.
Fun.
Fabulous.

Get your ducks in a row
with a confit market salad.